Draw a Box Outline in Photoshop
Adobe Photoshop is a raster-based paradigm editing software. It is developed past Adobe.Inc and available for both macOS and Windows operating systems. You can use Photoshop to create or edit images, posters, banners, logos, invitation cards, and various types of graphic designing piece of work. It provides various tools for designing and editing and the shape tools are ane of them. The Shapes tools in Photoshop are one of the most used tools in Photoshop. Nosotros tin describe different types of shapes similar rectangles, polygon, ellipse, etc. in Photoshop using unlike shapes tools like Rectangle tool, Polygon tool, ellipse tool, line tool, and custom shapes. They are used past all types of people including illustrators, designers, editors, and so on. They can be used in different ways according to the needs of the user. They also aid to make our work a lot faster and easier because without them we would accept to draw each of the shapes with our mitt using the Pen tool which would brand work much more tedious and time-consuming. The shape tools are present below the Text tool in the toolbar similar every bit shown in the below prototype:

Rectangle tool
The rectangle tool as the name suggests helps us to draw rectangles on our canvas.
How to create a rectangle tool?
Step i: Open whatever Photoshop certificate or a new certificate.

Step 2: Select the rectangle tool from the toolbar.

Step 3: The cursor volition modify to a (+) sign. Draw over the canvas.

Note: Your rectangle's outline width may exist different fifty-fifty there may exist no outline and in that location may exist background, this is considering of the setting which nosotros will understand subsequently in this article
Now, if we want to make a square shape, we can do information technology with the rectangle tool merely but when we describe a rectangle, we take to hold the Shift Central with it. It volition produce squares as shown below:

Properties of rectangle tool
Now, every time we depict a rectangle, we come across a properties tab pop us as shown below:

In that location's a lot of properties equally one can see let'southward understand this one by ane from acme to bottom:
i. Width(W) and height(H)
You tin can see it's already having some values in these boxes. This defines the width and tiptop of the rectangle. Nosotros tin alter the value of West and H individually. If we put W = 0, the rectangle will go a vertical line, and when H = 0, the rectangle will go a horizontal line. Besides, there is clip similar symbol betwixt the boxes if we click it then on changing either of width or the height, the other changes keeping the ratio fixed.
2. Ten-axis and Y-axis
These parameters tell about the position of the rectangle on the canvas. Now, by changing the value of the 10-axis and Y-axis, we can move the rectangle up, down, left or right.
3. Make full
This is the color fill up pick in drawing tools. By default, no color make full is practical. If we click on it then the color swatches appear as shown beneath:

Note: We can fill our shapes with gradients and patterns too.
Hither are a few examples where the rectangle is filled by a solid color, gradient, and design.
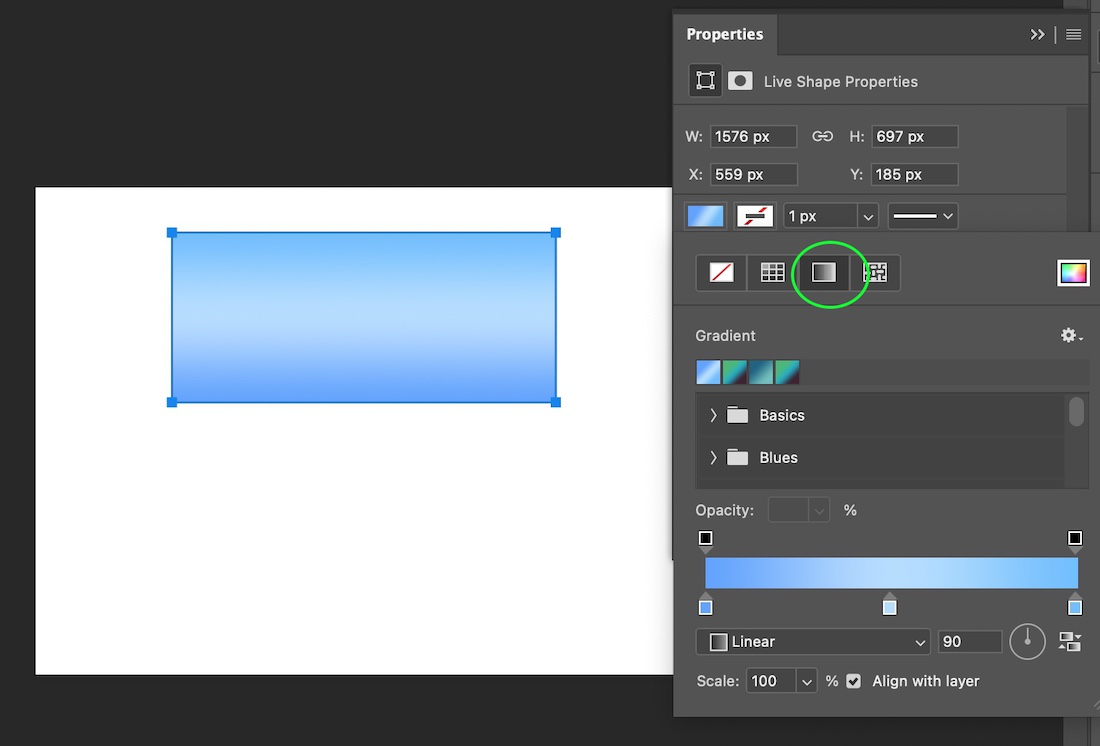
A rectangle is filled with a gradient
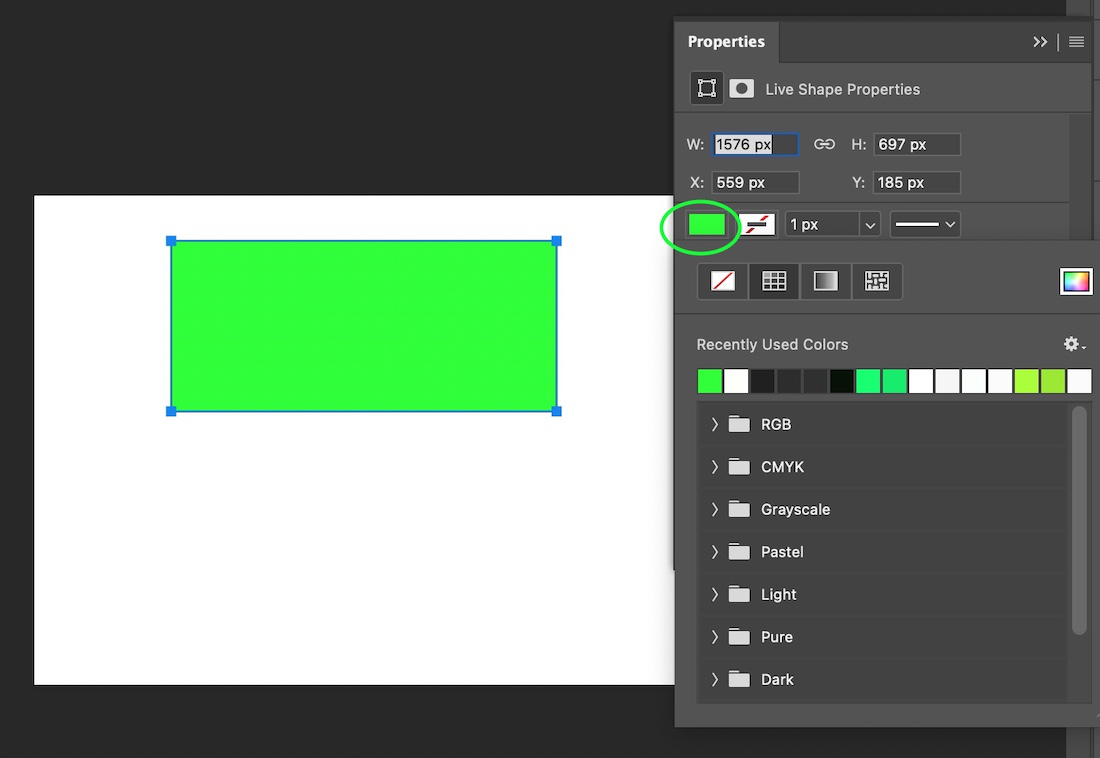
A rectangle is filled with solid
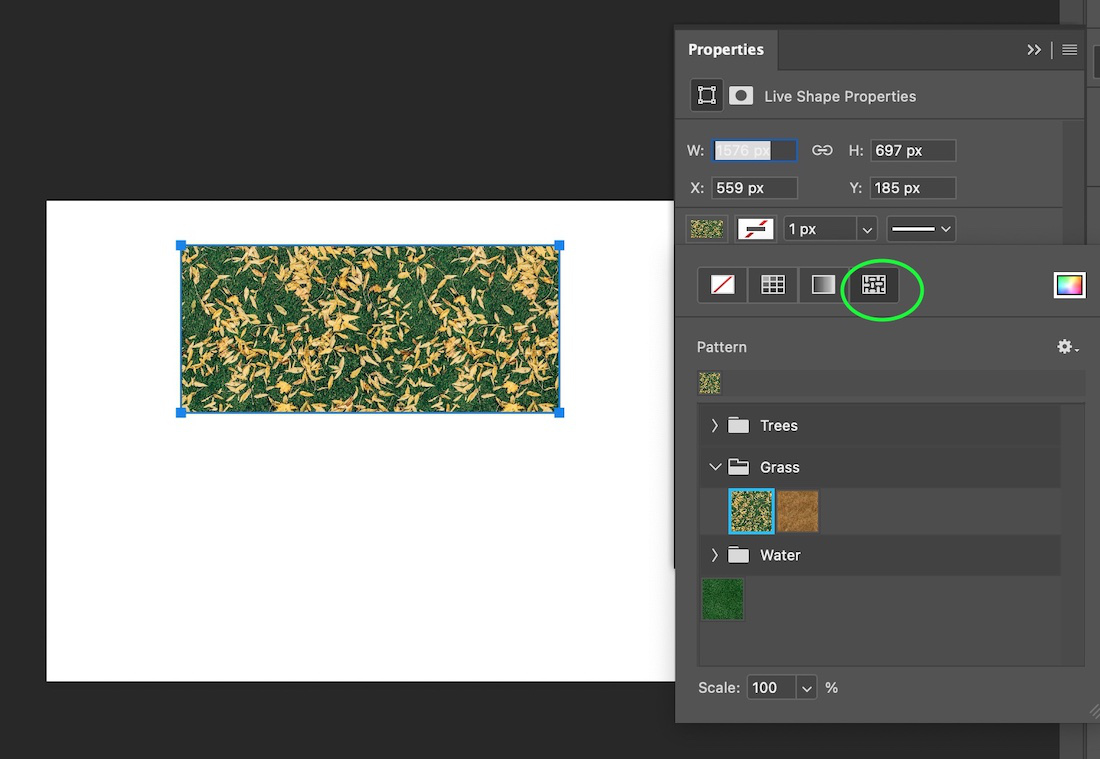
A rectangle is filled with a pattern
four. Stroke
This option helps us to define the color, gradient, and pattern of the border(or purlieus) of the shape(here rectangle). By default, it is set to black. We tin also change the width of the stroke. In all the images above, the rectangle had a stroke width of iv px. The range of value of stroke width can be anything between 0-1200 px.
5. Curved Corner Options
The very last settings in the backdrop settings is this part shown in the image below:

Past default, all the values are set to 0px. The iv boxes define the values of the four corners of the rectangle to brand them rounded. The range of the values of the range from 0-1000px. Here is an case where all the corners are rounded by 100px:

Rounded Rectangle Tool
The rounded rectangle tool is just the same as the rectangle tool. The but divergence betwixt them are the corners are rounded by default it is set to 10px and the rest of the other settings are the same as the rectangle tool.
How to draw an rounded rectangle?
Let's sympathise how to depict an rounded rectangle using the rounded rectangle tool.
Step 1: Open any Photoshop document or a new certificate.
Step two: Select the rounded rectangle tool from the toolbar.

Stride three: You will see the arrow will change to (+) sign.
Step 4: Drag over the Photoshop certificate to draw the ellipse as shown below:
Ellipse Tool
The ellipse tool in Adobe Photoshop is used to depict ellipse and circles in the Photoshop document.
How to describe an ellipse?
Permit's understand how to draw an ellipse using the ellipse tool.
Step 1: Open whatsoever Photoshop document or a new certificate.
Stride two: Select the ellipse tool from the toolbar.

Step iii: You volition see the pointer will modify to (+) sign.
Footstep 4: Drag over the Photoshop document to draw the ellipse every bit shown beneath:

Note: To draw a circumvolve we have to press the SHIFT key while drawing
Properties of Ellipse tool
Now having understood the process to use the ellipse tool in Photoshop, let's understand the properties tab of the Ellipse Tool that appears every time, nosotros describe a shape using the tool. We can also open the properties tab from the right side of the Photoshop document as shown below:

As we tin can come across from the in a higher place image, there are a lot of properties, let's understand them ane by 1 from the top to bottom manner.
one. Width
This defines the width of the ellipse. If we increasing its value then the width of the ellipse is as well increased.
2. Height
This defines the elevation of the ellipse. If nosotros increasing its value, so the pinnacle of the ellipse is also increased.
Note: In the above epitome, in that location is a clip like sign in between the Width and summit choice, if this is selected and so the width and elevation increment proportionally.
iii. X-centrality
This defines the position of the ellipse/circle created in the X-axis. Increasing its value makes the shape move horizontally towards the right and decreasing its value makes the shape motion horizontally towards the left of the certificate.
4. Y-centrality
This defines the position of the ellipse/circle created in the Y-axis. Increasing its value makes the shape move vertically up and decreasing its value makes it move vertically down of the document.
5. Fill
This is the make full of the shape. Currently, in the higher up shape, the make full is prepare to none. When we click on the fill box, a dialog box opens every bit shown below:

We can choose any colour and consecutively the shape will become filled by the selected colour every bit shown below, (hither we have selected red colour):
6. Stroke: The box next to the fill is Stroke. This box determines the stroke(or border) of the shape.
7. Stroke Radius: This box determines the width of the stroke. By default, information technology is ready to 1px. Information technology can have a maximum value of range 0-1200 px. If the stroke is fix to 0 px, then there is no stroke applied to the shape.
8. Stroke Options: This box determines the blazon of stroke: dotted, dashed, normal, and many more that can be applied to the stroke.
9. Path Operations: This option lets united states combine shapes to brand new shapes. There are four options: Combine shapes, Subtract from front shape, Intersect Shape areas, Exclude overlapping layers.
(i) Hither is an case of add shapes

(two) Here is an example of subtracting from the front shape.

(3) Here is an case of intersecting from shape areas.

(four) Here is an instance of excluding overlapping layers.

Polygon Tool
Polygon tool as the proper name suggests helps us to draw polygons on our Photoshop document.
How to draw a polygon tool?
Let's sympathise how to draw the polygons using the polygons tool:
Step one: Open whatsoever Photoshop document or a new document.
Footstep 2: Select the polygon tool from the Photoshop toolbar.

Pace 3: Drag over the certificate to depict the polygon equally shown beneath:

The properties of the polygon tool are the same as the other tools like the ellipse tool and rectangle tool except for one matter that is the number of sides. This choice helps u.s.a. to determine the number of sides in a polygon. As we know that a polygon can have iii-100 sides and each of them has a different name.
Line Tool
As the proper name suggests line tool, helps united states to describe lines.
How to draw lines?
Step ane: Open any Photoshop document or a new document.
Step 2: Select the line tool from the Photoshop toolbar.

Step three: Drag over the Photoshop document to draw a line as shown below:

The properties of the line tool are the same as the backdrop of the other shape tools.
Custom Shapes tool
As the proper noun suggests, the custom shapes tool lets us add some custom shapes other than the standard geometrical shapes to our Photoshop document. To empathise this tool, let's first run across the properties bar of the custom shapes tool equally shown below:

From the in a higher place image, you tin see that the properties bar is exactly the same as the other shape tools except the Shape pick marked in green. Using a custom shape tool, we can bring these shapes in our certificate.
How to create customer shapes?
Step 1: Open a blank Photoshop document.
Stride two: Select the custom shapes tool from the toolbar.

Step iii: Now, click on the shape option to select your desired shape (here we take select a bird) as shown below:
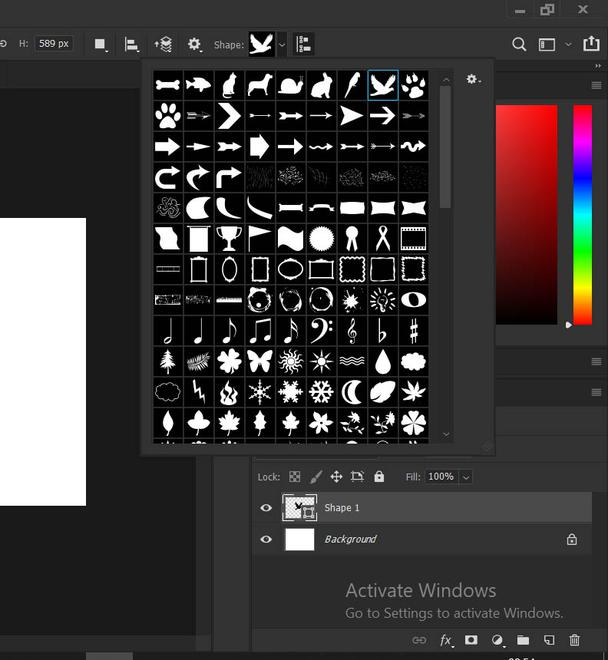
Choosing shapes from the shapes library
Step 4: Now drag over the document to make the shape as shown below:

Thus, we have learned to employ the custom shapes tool in Photoshop.
Annotation: Hither in the above diagram, your shapes option might not prove all the shapes initially, because you take not fabricated the settings to All.
Now permit'due south see how to use the shape library. When you click on the shape library, y'all can see a small settings icon on the right as shown below:
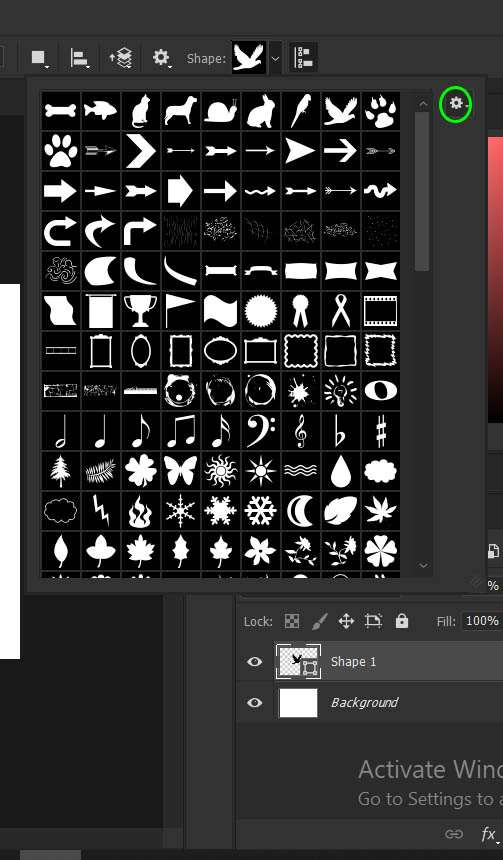
Settings option of the Custom Shapes tool
When you click on this setting selection, yous will see different options in the settings library as shown below:
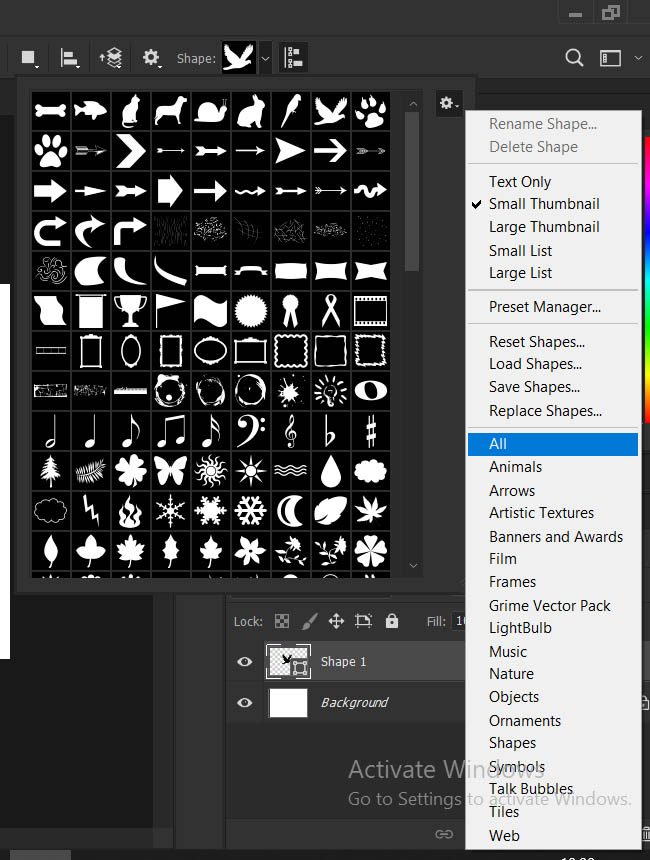
Using the Custom Shapes settings
There are several options like All, animals, birds, web and then on. When you lot click on whatsoever options your settings library volition load shapes based on the category. Here, I take made my category to All which loads all the shapes of the library.
Source: https://www.geeksforgeeks.org/how-to-use-the-rectangle-tool-in-photoshop/